vRealize Automation 7.0.1 Upgrade
vRealize Automation 7.0.0 to 7.0.1 Upgrade Process
High level steps:
Backup data
Upgrade vRA
Upgrade IaaS
Test/Validate
1) Stage upgrade binaries in a software repository, IIS or Apache – http://your-software-repository-host/repo/vcac/7.0.1/ – note if using IIS, you need to add MIME extensions. See method from VMware – https://kb.vmware.com/kb/1019288
Or use the CDROM ISO method by mounting the upgrade ISO image to the vRA appliance.
2) Backup vRA data from vRA core:
/etc/vcac/
/etc/vco/
/etc/apache2/
/etc/rabbitmq/
3) Backup vRA Postgres database – vRA core
4) Backup IaaS MS SQL database
5) Power off (in order)
5A) IaaS Windows Server
5B) vRealize Automation appliance – vRA core
6) Clone vRA core as backup (cleanup/delete after upgrade is successful) – Note you cannot increase a VM disk that has snapshots associated with it – cloning the VM in case of partition corruption on the vRA appliance.
7) Extend the vRA core appliance "Hard Disk 1" to 50GB from 18GB – required space for the upgrade per VMware HW requirements. Also, validate that the vRA core appliance has 18GB RAM and 4 vCPUS on 1 Socket.
8) Snapshot vms (vRA core and IaaS)
9) Power on vms – IaaS and then vRA core
10) Log into IaaS server and shutdown vRA services (in order)
10A) All VMware vCloud Automation Center agents – for each vCenter endpoint
10B) All VMware DEM workers
10C) VMware DEM orchestrator
10D) VMware vCloud Automation Center Service
Leave the IaaS server console open and do not reboot it once services are shutdown, they'll be restarted by the installer later on…
11) Validate that the IaaS service hosted in IIS is functional by testing its URL – https://your-IaaS-host/Repository/Data/MetaModel.svc
This should display an XML manifest page
12) Validate the IaaS repository log located at "C:\Program Files (x86)\VMware\vCAC\Server\Model Manager Web\Logs" on the IaaS server and verify that its status is OK in the logs – "context="" token="" (22) Response: OK 0:00.013"
13) SSH into the vRA core appliance and stop all vRealize Automation services (in order)
13A) service vcac-server stop
13B) service vco-server stop
13C) service vpostgres stop
Example:
your-vra-host:~ # service vcac-server stop
Stopping tcServer
——————————————————————————–
=== Checking vCAC Configuration…
Found in /etc/vcac/security.properties: csp.host
Found in /etc/vcac/security.properties: vmidentity.websso.host
Found in /etc/vcac/security.properties: vmidentity.websso.tenant
Found in /etc/vcac/security.properties: vmidentity.websso.solution
Found in /etc/vcac/security.properties: certificate.store.file
Found in /etc/vcac/security.properties: certificate.store.password
Found in /etc/vcac/security.properties: csp.component.registry.url
Found in /etc/vcac/security.properties: certificate.store.websso.alias
Found in /etc/vcac/security.properties: certificate.store.ssl.alias
websso, Jan 12, 2016, PrivateKeyEntry,
Certificate fingerprint (SHA1): XXXXXXXXXXXXXXXXXXXXXXXXXXXXXXXXXXXXX
apache, Jan 12, 2016, PrivateKeyEntry,
Certificate fingerprint (SHA1): XXXXXXXXXXXXXXXXXXXXXXXXXXXXXXXXXXXXX
VCAC configuration seems to be ok.
VCAC stop is allowed.
——————————————————————————–
Instance is running as PID=5804, shutting down…
Instance is running PID=5804, sleeping for up to 60 seconds waiting for shutdown
Instance shut down gracefully
your-vra-host:~ # service vco-server stop
Stopping tcServer
Instance is running as PID=6120, shutting down…
Instance is running PID=6120, sleeping for up to 60 seconds waiting for shutdown
Instance shut down gracefully
your-vra-host:~ # service vpostgres stop
Stopping VMware vPostgres: Last login: Wed Jul 6 19:44:00 CDT 2016 on console
ok
Special Note: While executing the commands in steps (14 – 20), you will receive a message from the system that you must perform a reboot before continuing, disregard and continue exactly as follows below. DO NOT REBOOT UNTIL STEP 21.
14) Unmount the vRA swap partition with "swapoff -a"
15) Delete the existing Hard Disk 1 partitions and create a 44 GB root partition and a 6 GB swap partition (1 command)
(echo d; echo 2; echo d; echo 1; echo n; echo p; echo ; echo ; echo '+44G'; echo n; echo p; echo ; echo ; echo ; echo w; echo p; echo q) | fdisk /dev/sda
16) Change the swap partition type
(echo t; echo 2; echo 82; echo w; echo p; echo q) | fdisk /dev/sda
17) Set the Disk 1 bootable flag
(echo a; echo 1; echo w; echo p; echo q) | fdisk /dev/sda
18) Register the partition changes with the Linux kernel
partprobe
19) Format the new swap partition
mkswap /dev/sda2
20) Mount the swap partition
swapon -a
21) Reboot vRA core appliance
22) Wait for the appliance to boot and resize the Disk 1 partition table – this may take a couple minutes
resize2fs /dev/sda1
Example:
your-vra-host:~ # resize2fs /dev/sda1
resize2fs 1.41.9 (22-Aug-2009)
Filesystem at /dev/sda1 is mounted on /; on-line resizing required
old desc_blocks = 1, new_desc_blocks = 3
Performing an on-line resize of /dev/sda1 to 11534336 (4k) blocks.
The filesystem on /dev/sda1 is now 11534336 blocks long.
After resizing your vRA appliance, it should look like this using the disk free command df -h
sda1 should now be 44G
your-vra-host:~ # df -h
Filesystem Size Used Avail Use% Mounted on
/dev/sda1 44G 11G 31G 27% /
udev 8.9G 112K 8.9G 1% /dev
tmpfs 8.9G 12K 8.9G 1% /dev/shm
/dev/sdb1 6.9G 1015M 5.6G 16% /storage/log
/dev/sdb2 7.9G 147M 7.4G 2% /storage/ext
/dev/sdc1 25G 173M 24G 1% /storage/artifactory
/dev/sdd1 50G 1.4G 46G 3% /storage/db
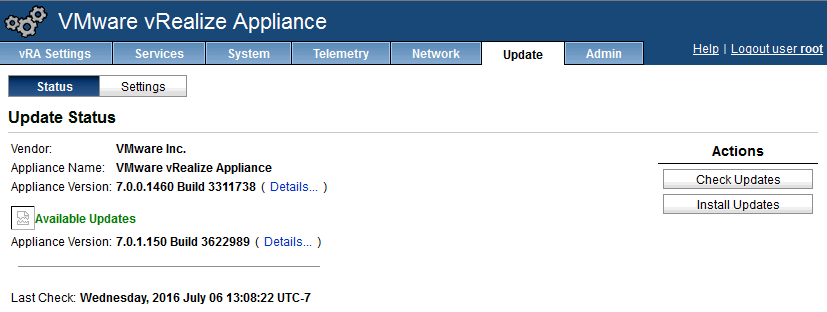
23) Prepare for the upgrade. Go to the vRA VAMI – https://your-vra-host:5480
log in as root, go to the Update tab, click settings and add your repository URL – http://your-software-repository-host/repo/vcac/7.0.1/, then click save.
24) Verify ALL vRA services are running all except "iaas-service" and at least 2 vCO services must be running in the VAMI prior to launching the upgrade, on services tab – https://your-vra-host:5480
25) Go back to the updates Status tab and click "Check Updates" – you should see "Available Updates in green font appear.
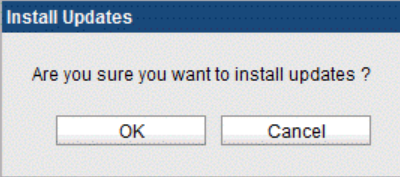
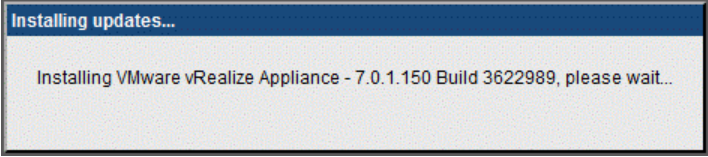
26) Click "Install Updates" and proceed, you will see an "installing updates…" screen
27 Optional) SSH into the vRA core and watch logs related to the upgrade progress from the following locations:
/opt/vmware/var/log/vami/updatecli.log
/opt/vmware/var/log/vami/vami.log
/var/log/vmware/horizon/horizon.log
28) Once the installer completes, reboot the vRA core appliance and wait for all vRA core services to start in the VAMI except IaaS- https://your-vra-host:5480
29) Download the newly upgraded IaaS server components and stage them on the IaaS server- https://your-vra-host:5480/installer – the "IaaS installer" link
30) Log in as "the admin/SQL DBO acct/ AKA administrative service account" and upgrade the new IaaS server components – run the installer on the IaaS server Desktop location and make sure that "Upgrade" is selected.
(admin account is "root" when prompted) after the installer runs and does its prerequisite check, leave all of the defaults selected on the "Detailed Components" screen except unselect "Use SSL for database connection.
on the "Component Registry" screen click "Load" and "Download" buttons to auto-polulate the fields, SSO admin = "administrator". click on the "test" links to validate. you should receive a "Passed" result status displayed.
finally click the "Upgrade" button and watch the output window for progress. This process, (IaaS installer) will take approximately 1.5 hours including data input. From clicking "Upgrade", it took "Execution time:86.656" to complete.
Note that the prerequisite checker should all return successful without having to modify the IaaS configuration.
31) Validate the upgrade version and functionality – test logging in, provisioning, logging and monitoring, vCO configuration, tenant settings such as endpoints, business groups, compute resources, naming prefixes, network pools/profiles and blueprints.
From VAMI post upgrade: Appliance Version: 7.0.1.150 Build 3622989
This is a condensed version of the steps included within the nicely written VMware document, "Upgrading from vRealize Automation
7.0 to 7.0.1" located here:
http://pubs.vmware.com/vra-70/topic/com.vmware.ICbase/PDF/vrealize-automation-701-upgrading.pdf
Thank you, Rob Shaw
7/8/2016